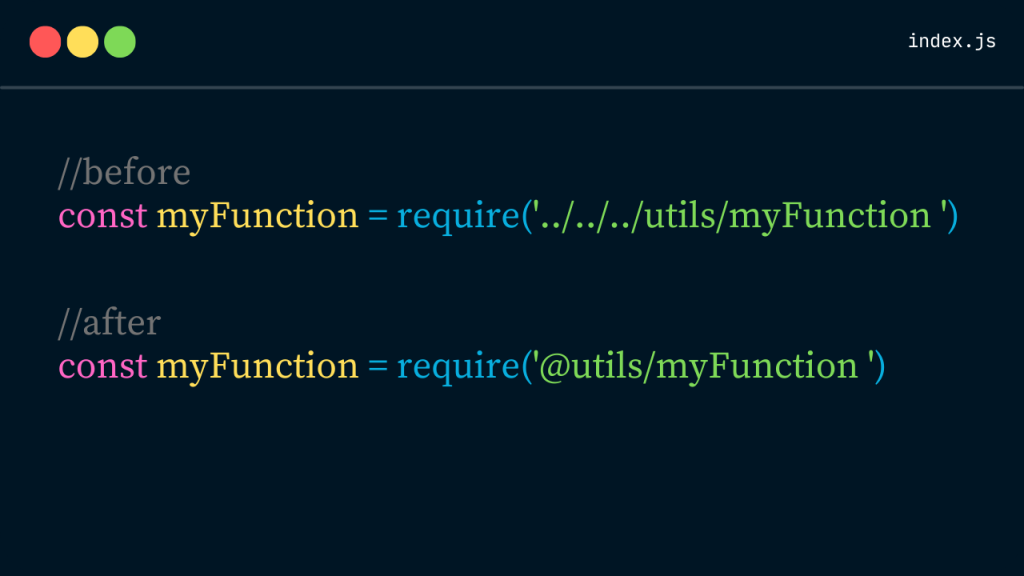
In Node.js development, growing project complexities often lead to what is commonly known as “imports hell.” This usually occurs as developers deal with lengthy, hard-to-manage import paths that look something like require('../../../utils/someUtilityFunction'). Not only do such paths make code harder to read, but they also make it more challenging to reorganize your project’s structure later on. Thankfully, there’s a straightforward solution to this problem: module aliases.

What is Imports Hell in Node.js?
Imports hell in Node.js refers to difficulties and confusion that come from managing numerous, often nested, file import statements in large projects. This can lead to error-prone, hard-to-read code, especially when files are deeply nested in the project’s directory structure.
Integrating Khalti Payment Gateway with Node.js and MongoDB: A Detailed Guide
Step-by-Step Guide to Using Module Aliases
1. Install Dependencies
First, ensure you have the module-alias package installed, as it’s required for defining aliases in your project. If it’s not installed yet, run:
npm install module-alias --saveThis package allows you to create aliases for directories, making your import statements cleaner and more manageable.
2. Define Aliases in package.json
In your package.json, under the _moduleAliases key, define aliases for your project’s directories. Here’s an example:
"_moduleAliases": {
  "@controllers": "./controllers",
  "@models": "./models",
  "@middleware": "./middleware",
  "@services": "./services",
  "@utils": "./utils",
  "@database": "./database"
}
This configuration maps shorthand aliases to their respective directories in your project.
3. Configure jsconfig.json for Development
For a better development experience and to enable support for these aliases in VS Code’s IntelliSense, configure your jsconfig.json as follows:
This step ensures that your editor recognizes the aliases and provides appropriate suggestions and auto-completions.
{
  "compilerOptions": {
    "baseUrl": ".",
    "paths": {
      "@controllers/*": ["./controllers/*"],
      "@models/*": ["./models/*"],
      // Add other aliases as needed
    }
  },
  "exclude": ["node_modules", "dist"]
}
4. Use Aliases in Your Code
With your aliases configured, you can now simplify your import statements. Instead of using relative paths, you can use the aliases you defined. For example:
// Before
const UserModel = require('../../../models/User');

// After
const UserModel = require('@models/User');
This makes your code cleaner, and easier to read and simplifies the process of moving files around within your project.
5. Running Your Application
To make sure your aliases work when you run your Node.js application, you might need to require the module-alias/register module at the very start of your entry file (usually index.js or app.js). This is often necessary when running your application directly without a build step that resolves these aliases.
require('module-alias/register');
// Your application code follows
Conclusion
By following these steps, you can effectively handle imports hell in your Node.js projects, leading to a more manageable and maintainable codebase. Module aliases enhance code readability and simplify refactoring and the development process as a whole.
Remember, while setting up module aliases requires a bit of initial configuration, the long-term benefits in terms of code clarity and simplicity are well worth the effort.


